FAQ for users
What is BeDJ?
BeDJ is a new company that aims to make it easy to learn how to DJ. Using a revolutionary new approach to DJ tuition, our specially designed DJ ‘Homeworks’ take you through a mix ‘step-by-step’.
It’s very simple to follow along. Everything you need to do is timestamped in the detailed visual overview. If you recreate everything you see on the screen you will create the same mix in your preview! Simple
What do I need to follow along and get going?
You can use any DJ software/equipment. This includes digital mixers such as YOUDJ, Serato, Rekordbox, Traktor, Beatport DJ App, (and others) with or without controllers.
You can also use more professional DJ equipment such as Pioneer CDJ-2000’s and upwards.
Who is BeDJ best suited for?
Anybody! You only need to be able to follow along the Homework. It’s all clearly labelled and identified.
Where do I start with BeDJ?
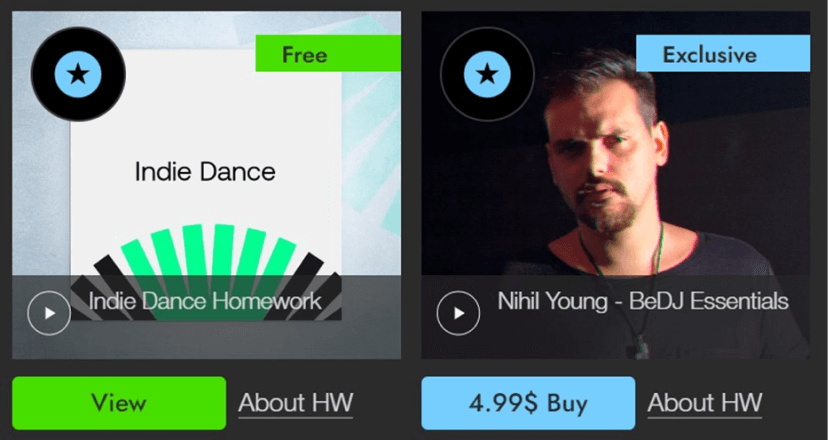
1. Find a Homework you like. We suggest starting with the Free Homework. Here is an example: https://bedj.io/homework/100-free-hw-1
2. Hit the PLAY button the mix artwork to hear the mix.
3. Click the About HW button to reveal detailed information about the Homework.

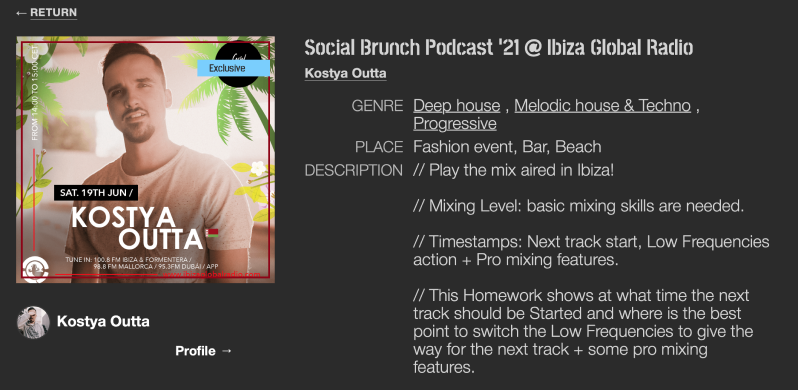
4. Pay special attention to the skill level required. If you’re a beginner find a Homework designed for beginners. Here is a good example: https://bedj.io/homework/mainstage/preview
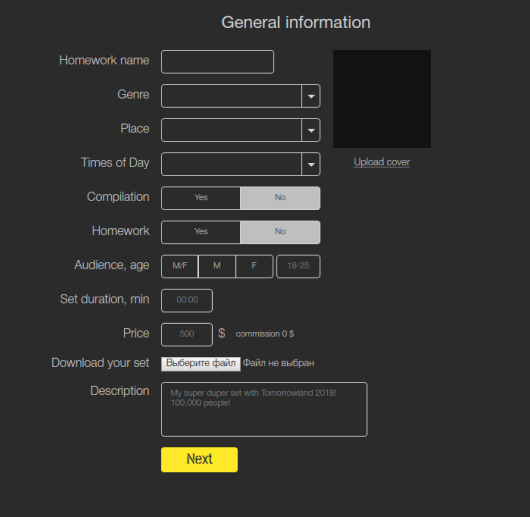
5. Press the VIEW button to open a Homework. Note some of the Homework are only available after purchase. After you purchase a Homework, it is stored in your account and available forever. You will find it under Purchase Homework.
How to use a HW?
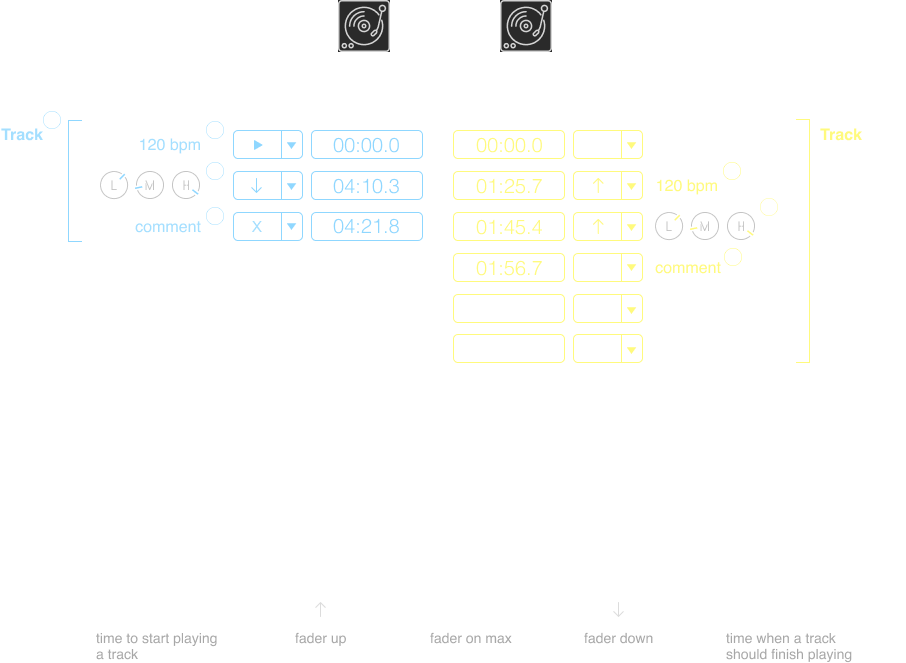
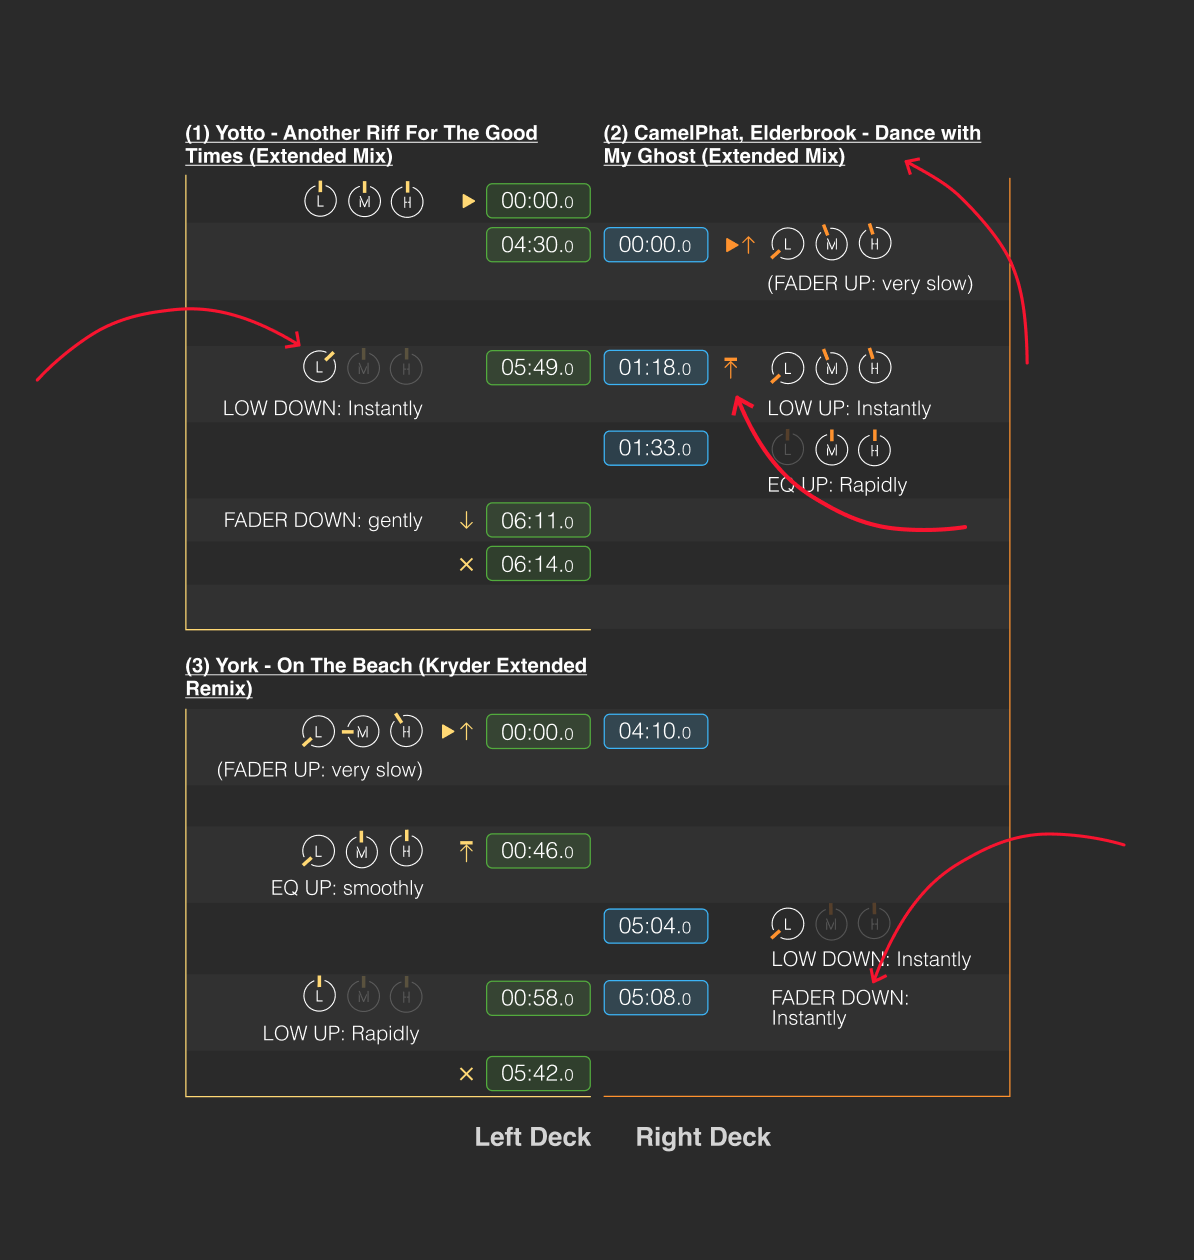
1. An HW contains instructions and an easy to read layout with all the necessary timestamps to make your mix sound professional.
2. Explanation of the main symbols is provided above these instructions.

3. Each rectangle (block) covers actions and instructions related to a single track, the name of which is indicated next to it.
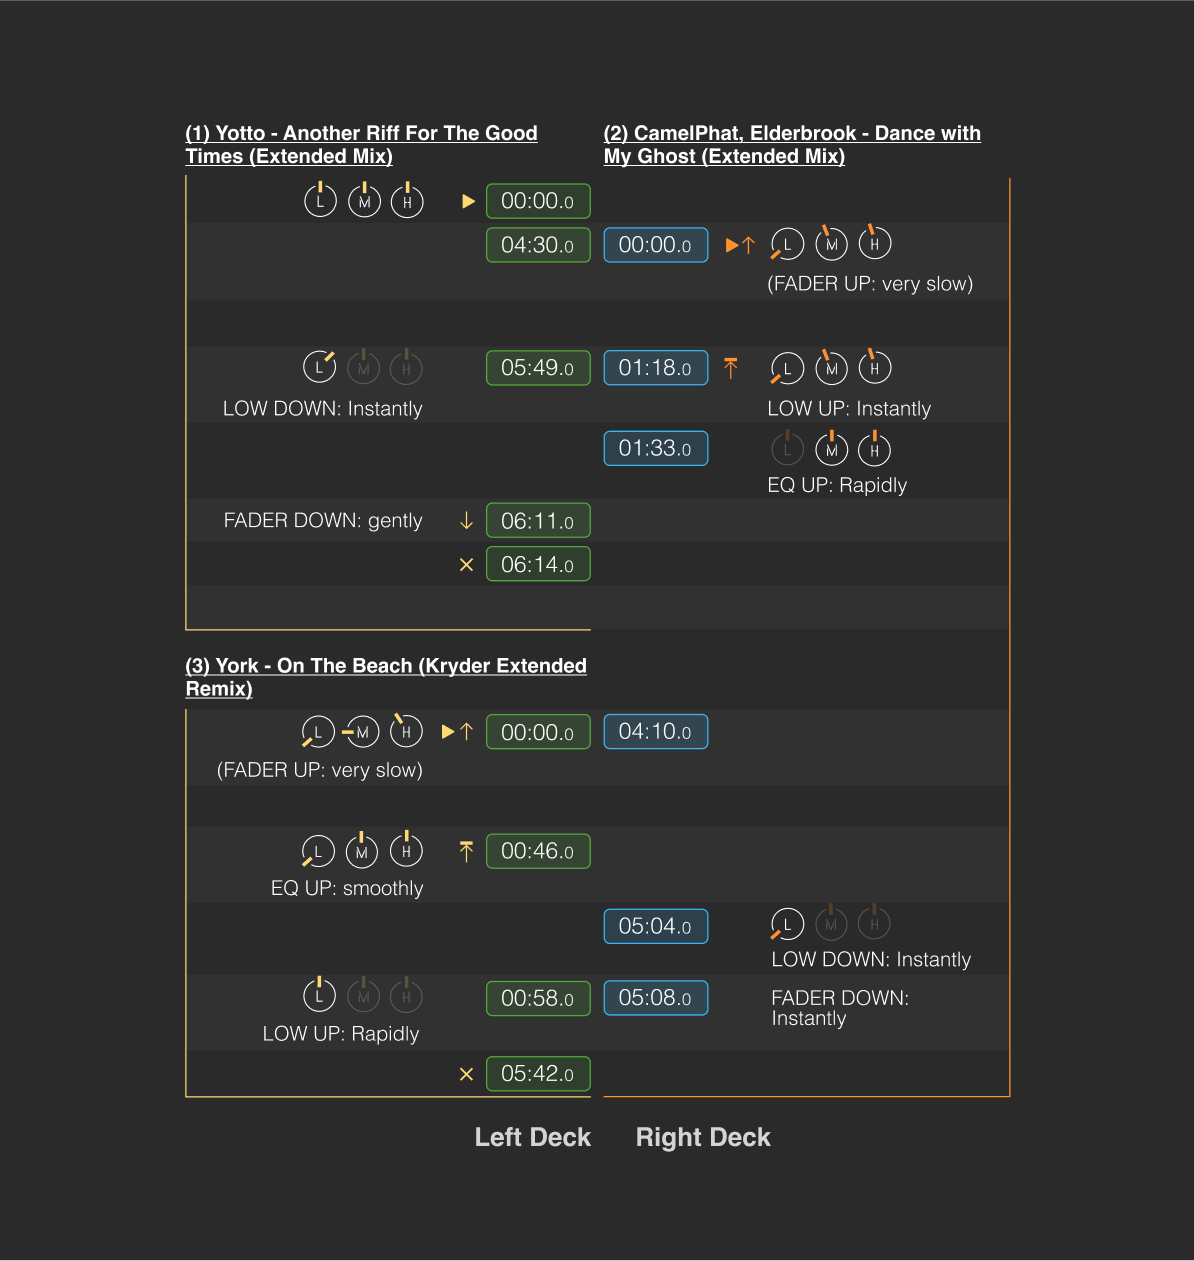
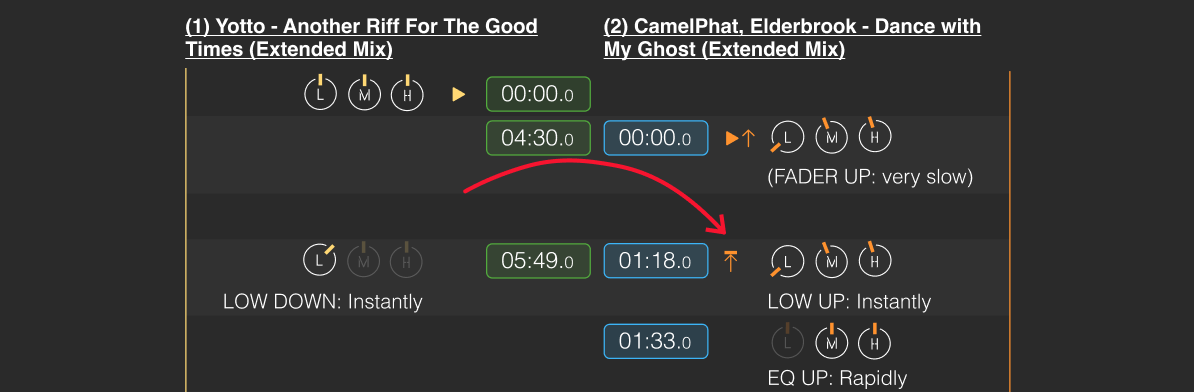
4. The ▼ symbol indicates pressing the “Play” button. 00:00.0 is the time when the track starts playing.
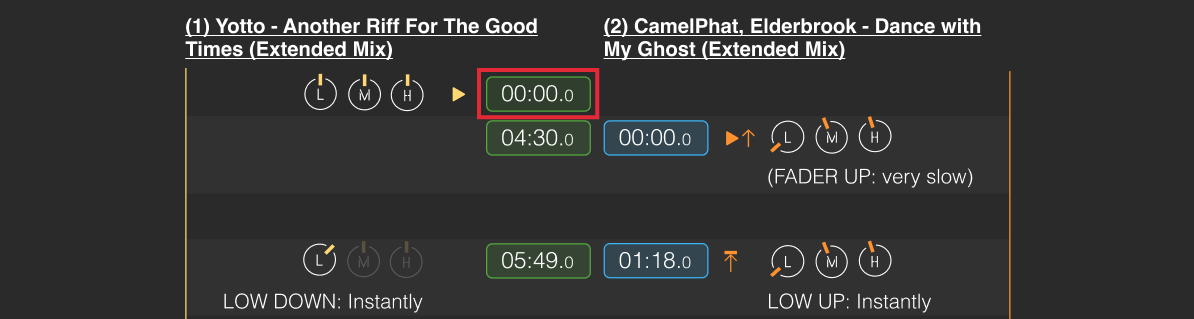
5. The ↑ symbol indicates the time when it is necessary to start raising the fader. Raising speed is indicated in a comment next to the symbol.
Therefore, you need to start track 2 at 00:00.0 and begin to raise the fader slowly.
Attention: according to these instructions, Track#2 must start playing when Track#1 reaches a timestamp of 04:30.0.
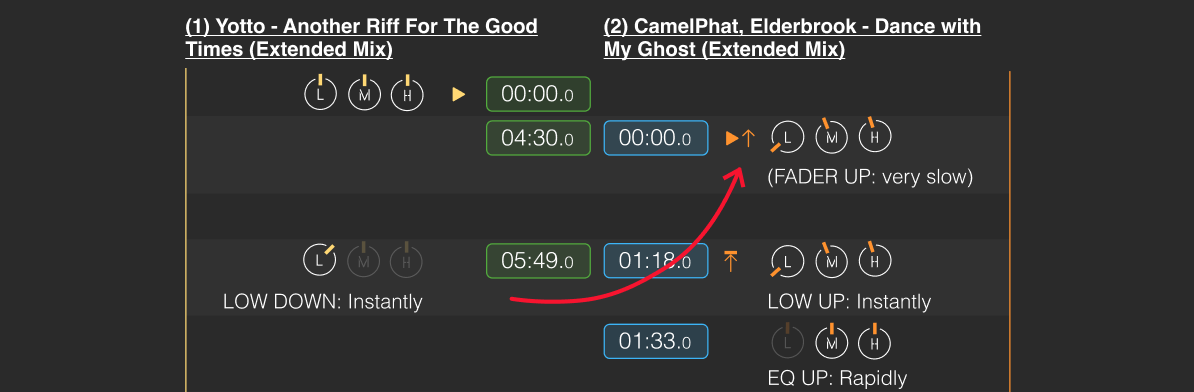
6. This symbol indicates the time of the track by which the fader must be at the maximum position. Therefore you need to raise the fader very slowly from 00:00.0 to 01:18.0 in order to be ready for these further actions by 01:18.0.
7. This symbol is used to indicate the position of equalizer (EQ) controllers.
Beginning of the track = initial position.
Further - required position of the controllers starting from specified time. Controller rotation speeds are indicated in the comments.
Attention: Controller are shown in horizontal position; however, their sequence is the same as on a DJ mixer:
(L )– Low; (M) – Medium; (H) – High.

8. The comments indicate the required course of action. They also contain other information e. g. looping etc.

9. The ↓ symbol indicates a downward movement on the fader. Start lowering the fader at 06:11.0.
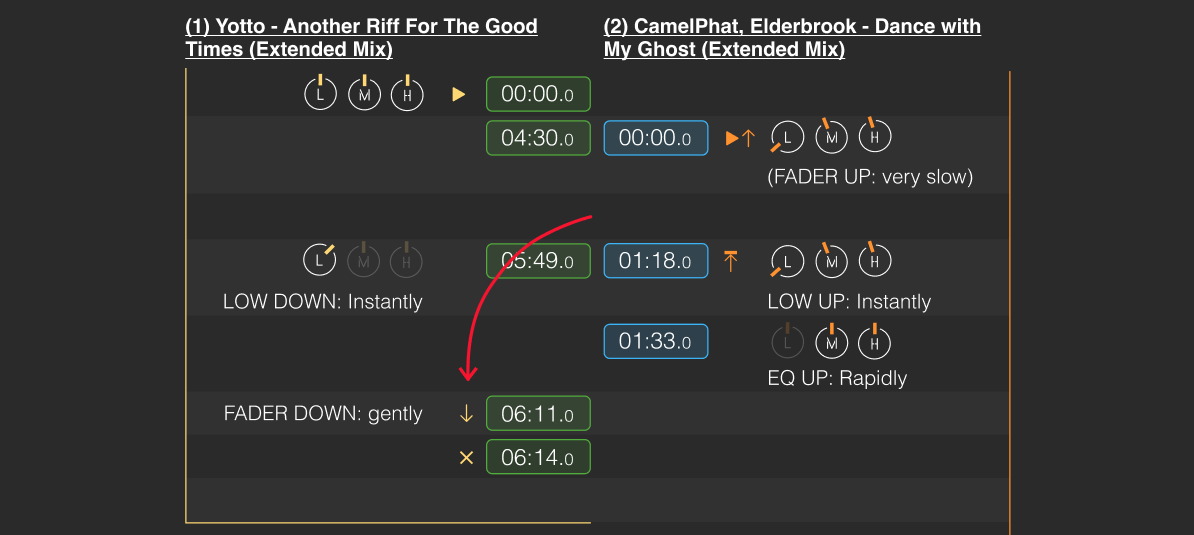
10. The Х symbol shows the time when the track should stop playing. As a rule the fader is already at the very bottom by this time. Therefore from 06:11.0 to 06:14.0 the fader is smoothly lowered and the track stops playing.

11. The scheme contains links to all tracks used in the mix. In order to open the link to a track, simply click on its title.
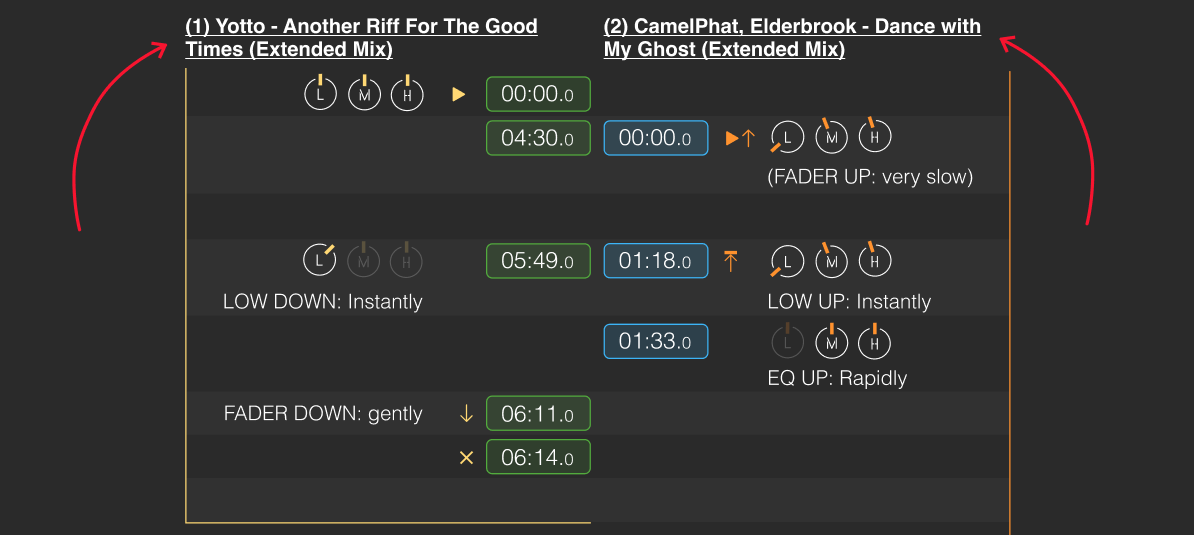
By following all timestamps and instructions in the scheme, you’ll be able to play this mix on your own and it’ll sound as if it’s performed by a professional.
Enjoy!!
Still confused?
Visit Attack Magazine’s walkthrough tutorial and video to learn more: https://www.attackmagazine.com/reviews/bedj-a-step-by-step-timestamped-guide-for-learning-how-to-dj/